|
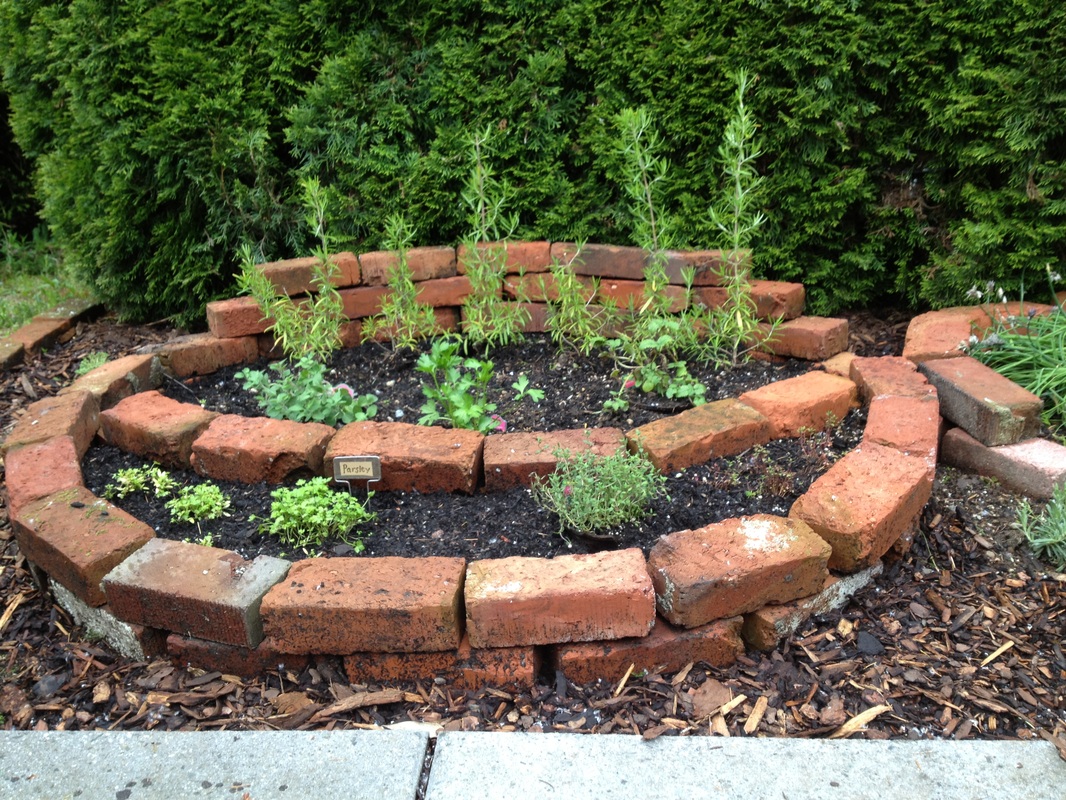
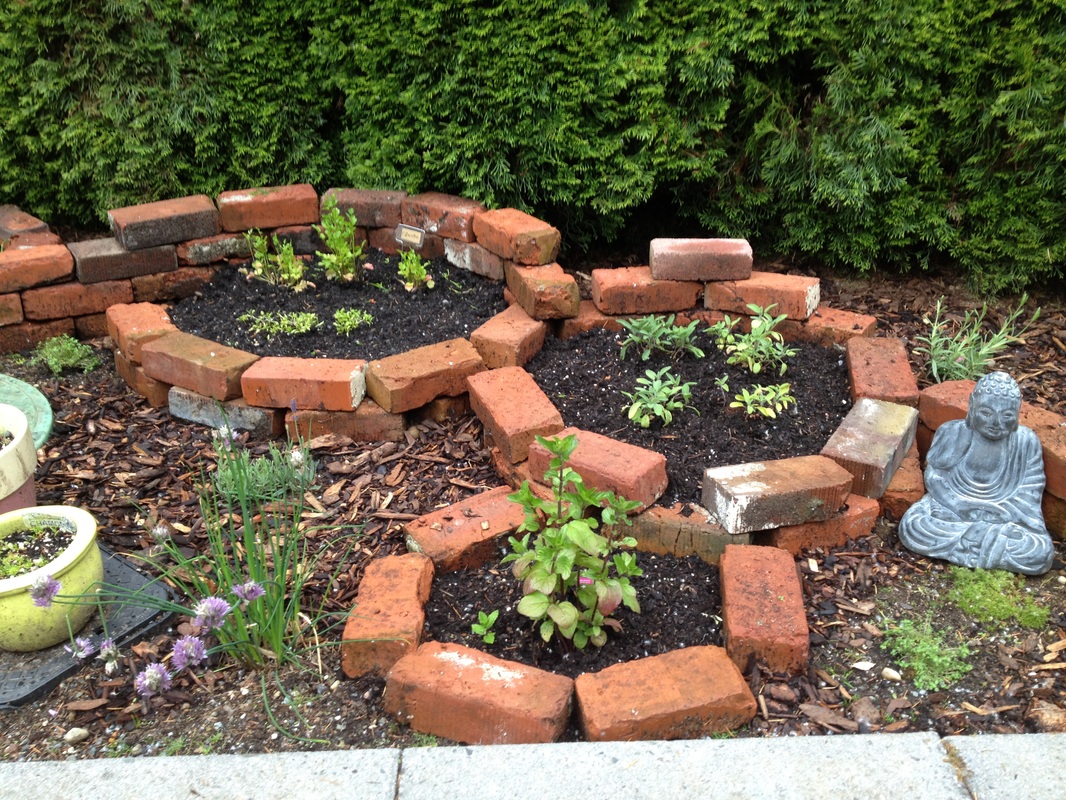
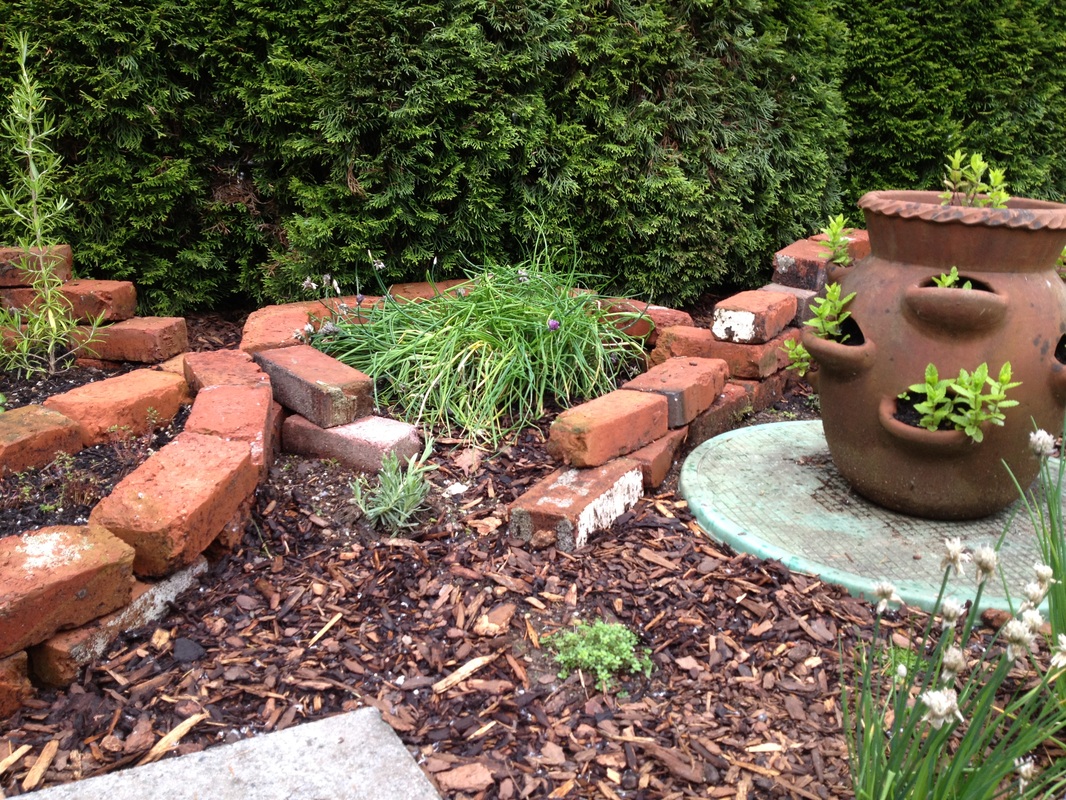
Now that my herbs are a little more sturdy, I'm re-thinking the arrangement of the garden itself. I'm having trouble with weeds (horsetails), slugs and rabbits. An omelet made with eggs from my own organic-fed chickens, topped with a garnish of chives and slug slime? Mmm.  Is it an herb garden, or a yard sale? I've been "pinning" raised herb gardens and came across the one below, made with bricks. Since I use salvaged bricks all over my garden and it's pretty much the only material I have lying around, I might give it a try. I have to figure out how to keep the mint out of the ground, hide the hideous septic lid, which is in the center of my garden space and keep the bricks on. Seems tricky. 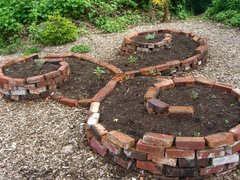 Raised garden bed, made with bricks. (Photo from Pinterest) *** The Next Day *** Yesterday, I removed all my pots and decorations from my old herb garden (a.k.a. the "yard sale") and scraped the weeds up with my trusty hoe. I leveled the ground and then kinda just went for it. I brought 6 bricks at a time over, from my pile elsewhere in the yard, and made my swirly design until it fit the space and my needs. I included two levels for planting, in addition to the ground level, so I ended up planting at three different levels.
It's a very interesting garden design idea and certainly captures the attention. I added lavender to give it an evergreen and of course there's the artichoke on the far right. I also transplanted my rosemary from its moldy, wood planter and gave it a new home on the far left. This type of garden bed can also be used for vegetables. 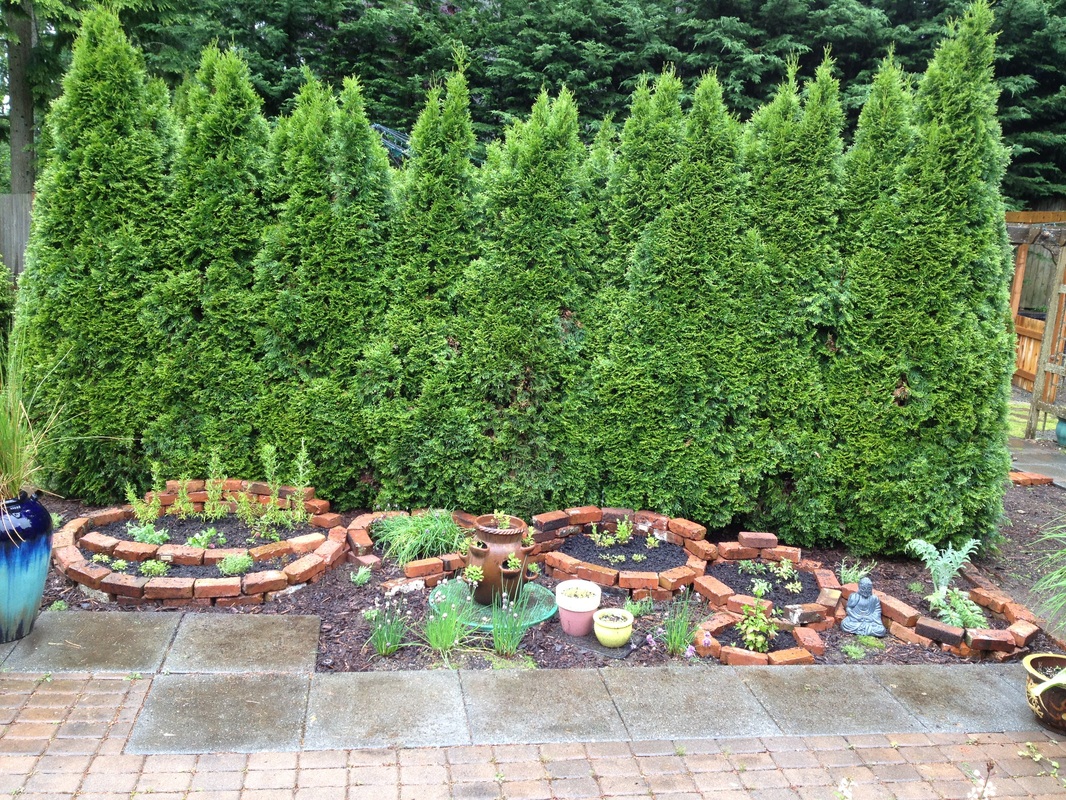 Herbs: Lavender, cilantro, lemon thyme, chives, chamomile, mint, sage, lemon mint, lavender, Mother-of-Thyme (ground-cover), artichoke. When transplanting my homegrown plants, I was surprised at how extensive some of the root systems were, even for the smallest of herbs. Hopefully, they have enough room to expand and my herb garden will be rockin' in three years or so. My concerns for my garden were slugs, rabbits and weeds. I can easily add slug bait inside the swirly, brick planters. The rabbits will still have access to my herbs, but so far, that hasn't been a problem this year. They stick to munching on the delicious weeds in my grass. As for weeds, I put a single layer of newspaper between the ground level and my fresh compost. I also hoe'd the weeds and added a thick layer of cedar mulch which will deter weeds and look nice around the garden. The mulch will break down, so I'll certainly keep an eye on the evil horsetails. I also have weed killer and I'm only a little afraid to use it around my edible herbs. The unsightly septic lid is a necessary evil, bit hopefully the potted mint and chives mask the green lid. I definitely recommend creating a brick planter to anyone who is considering it. If you have the materials (preferably free, or recycled) it's a great project because it's so fluid. You can change your mind about a specific space and make the bed higher, or larger... and it gives you a chance to be creative. I'm excited to see my little herb garden mature even more, as the seedlings I grew under lights last winter thrive in this new garden bed. 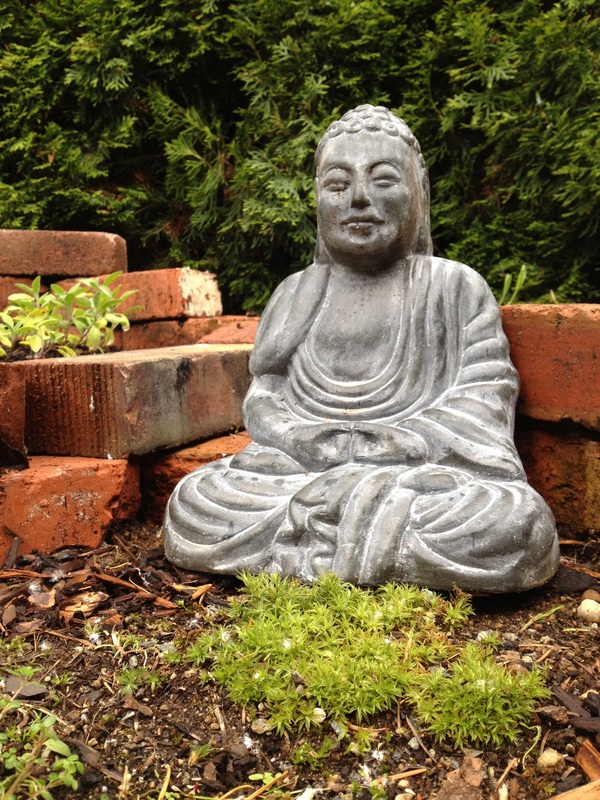 Happy Bodhisattva with sage over his right shoulder.
1 Comment
Since I'm a newbie at planting from seeds, I'm just "googling" for "how to" instructions. 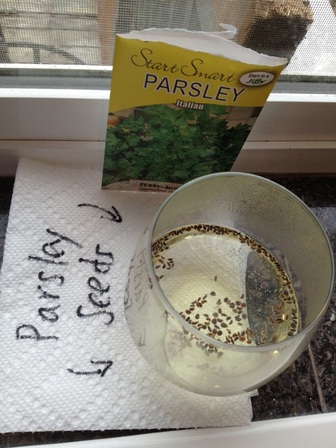 Does this look right? Let's hope they germinate. The instructions below were taken from the Vegetable Gardener blog.
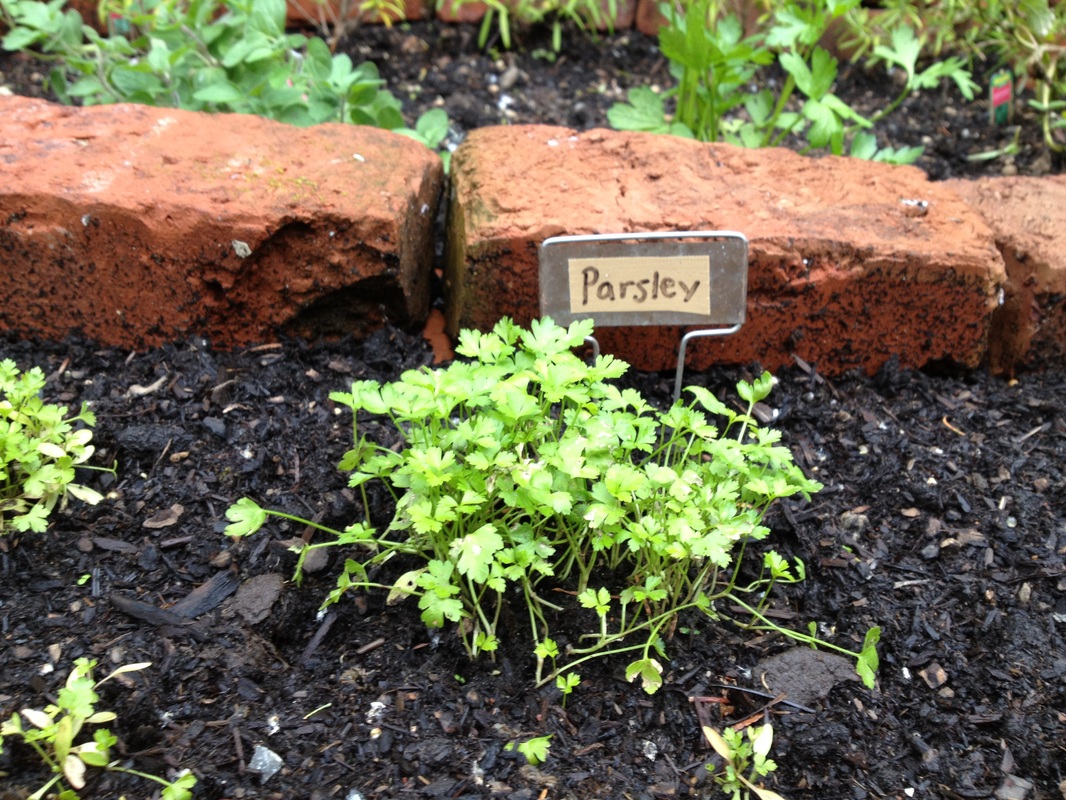
Hot water helps seeds to sprout About the only aspect of growing parsley that can cause trouble is starting the seeds. Parsley has a reputation for being difficult to start, and many herb books include an adage about parsley going to the devil seven times before it sprouts. To help them along, I pour hot water over the seeds and let them soak for 24 to 36 hours. The water softens parsley’s tough seed coat to make germination easier. I start my seeds the first week of March, and it takes two or three weeks for them to germinate. After they’ve soaked, I pour off the water and briefly drain the seeds on a paper towel to make them easier to handle. I fill 1-1/2-in. plastic cell packs with a seed-starting mix and while the seeds are still moist, I spread five to ten of them on the surface of each cell. Because it’s imperative that the soil remain moist, I loosely cover the planted seeds with a clear plastic bag, leaving the end open for air. When the seeds have sprouted, I remove the plastic and put them under fluorescent lights. After the plants have sent up their first true leaves, I thin each cell to the strongest plant by snipping its cellmates with scissors. Snipping prevents soil and root disturbance that could result if I pulled out the other plants. For the rest of the instructions, check out Vegetable Gardener blog. (Post update from a few days later...) So, I kinda skipped the part of the instructions above about putting the seeds in soil. They're still sitting in the wet paper towel. It's funny how confused I am and how complicated growing parsley is for me. I'm distracted by the mid-March snow that keeps surprising me. I can't seem to get outside to get the potting soil because I have so many questions. Do I use potting soil or some other type of non-amended soil? Do I really need a grow light, or can I just stick them in the kitchen window? If I need a grow light, what bulb do I buy? I've been asking the Internet, but every answer seems dependent on a list of variables. It's such a simple task I guess I don't want to screw it up by being impatient and doing it wrong. I finally googled "is it worth starting herbs from seed?" and the internet said "No" and the internet said "definitely!" I have oodles of seed packets and buckets of stubbornness and determination. This is going to happen. Indoor Herb Garden for Beginners Forum on Garden Web |
Avant-Garde(n)Quick updates charting my novice and experimental, gardening adventures at home. Archives
September 2019
Categories
All
Click here for a link to other garden bloggers
|
 RSS Feed